Greetings,
in this tutorial we are going to setup the V-Ray renderer for having realistic
visualization.
After you
have installed V-Ray it needs to be activated. Go to menu item Rendering->Render
Setup or use F10 hotkey.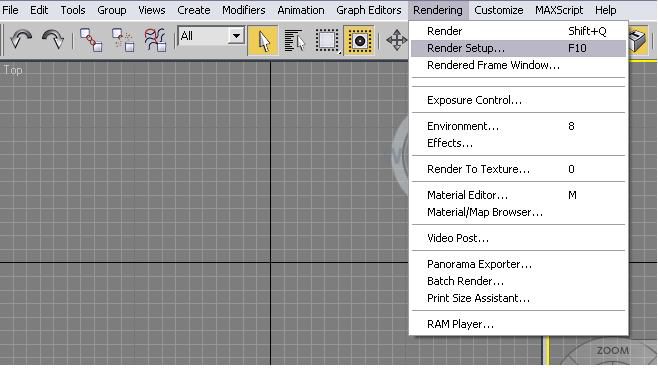
In the
window which appears you have to assign V-Ray renderer as a default one, so it
will be used by 3d Max while rendering.
In this Render
Setup window you can see lots of groups and subgroups of settings. Go to Commontab first. Find the Assign Renderer subgroup, and click on choosing
button for the Production renderer setting. Window Choose Rendererappears having all the installed renders listed. Choose V-Ray, the window will
be somewhat like this: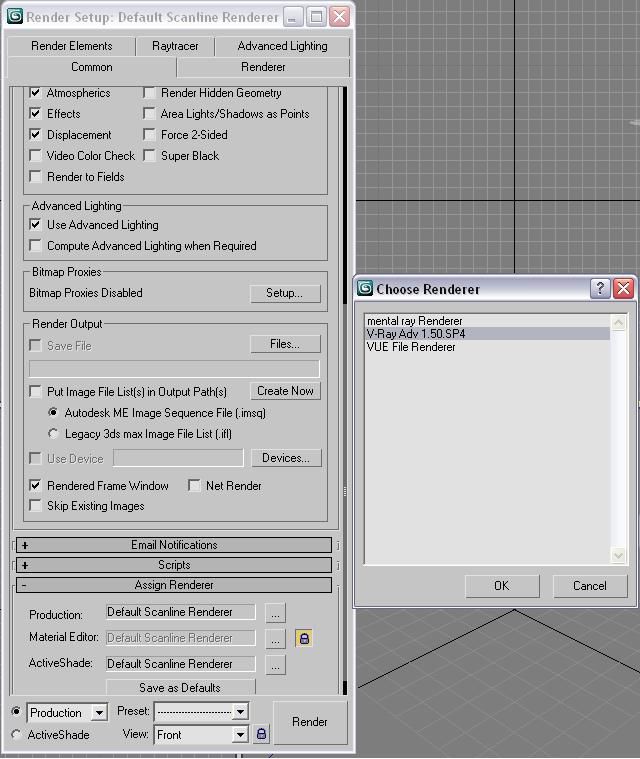
After you
have V-Ray assigned as default renderer the setup window might slightly be changed.
Now it is
time to do some render configuration.
Render resolution
In the Commontab, Common Parameters subgroup, Output Size parameters group is
located. Here you can set the renderer’s output image size. For the test render
it is best to set some low resolution, e.g. 640x640, thus save much time.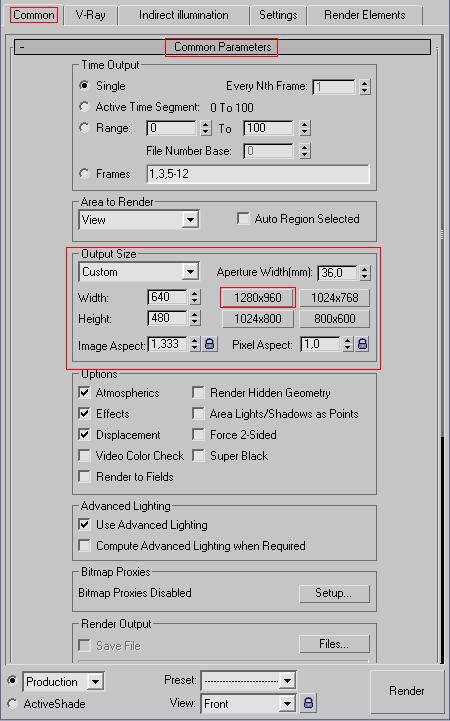
Once you’ve
done that let’s move to the other settings.
Lightning
In the V-Raytab, you might find interesting V-RAY::Image sampler(Anatialiasing), please
take a look at Adaptive DMC type.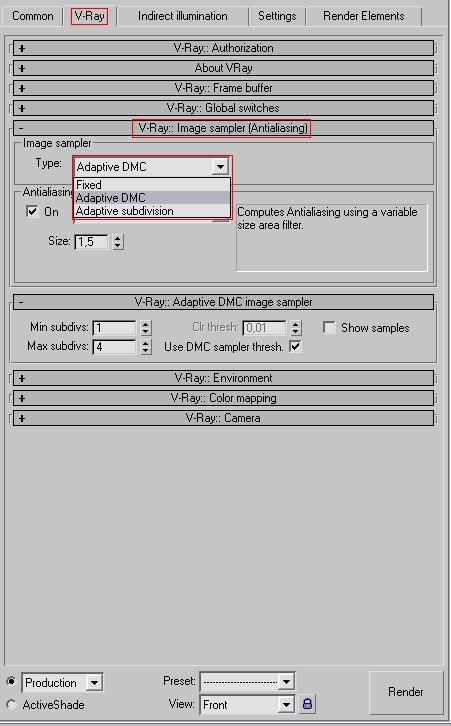
After this
let’s move to yet another setting, V-Ray Color mapping. The most often used
type is Exponential.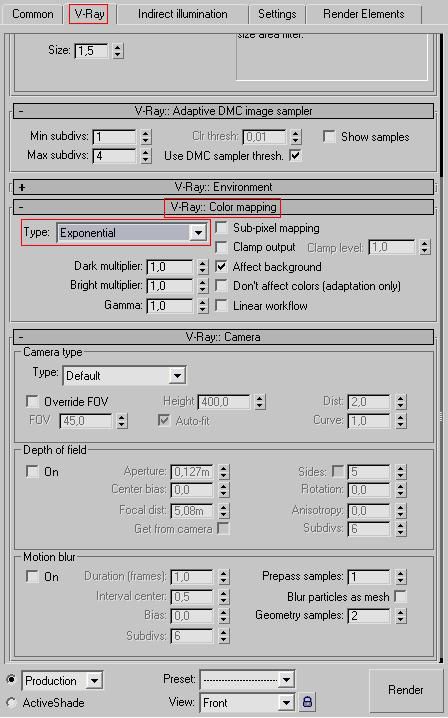
Indirect illumination
Enable the
On check box. That would allow us to apply settings.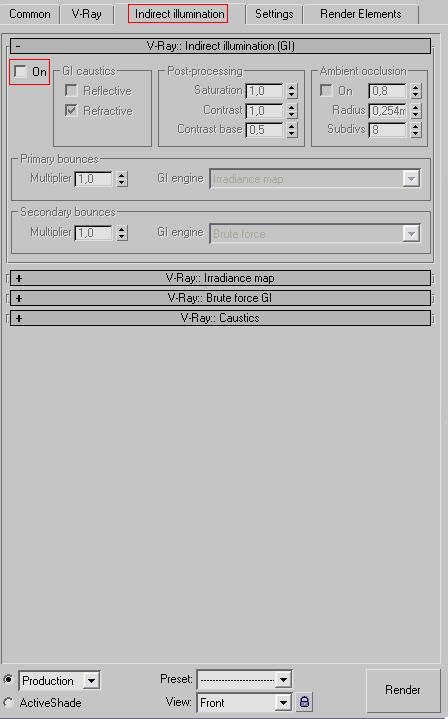
Saturation – this parameter determines how much the
objects will influence the color of the lightning in interior or exterior.
More in
this block:
Primary bounces -> GI Engine – set Irradiance map
Secondary bounces -> GI Engine – set Light Cache
Like this: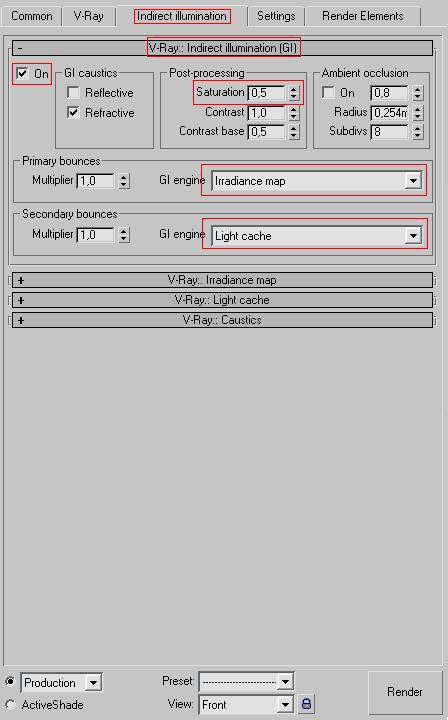
Let’s go
further and setup the V-Ray Irradiance map.
In Built-in
preset block set Very high for the whole preset. Also enable Show calc. phase,
it makes it possible for us to see what happens at the render time.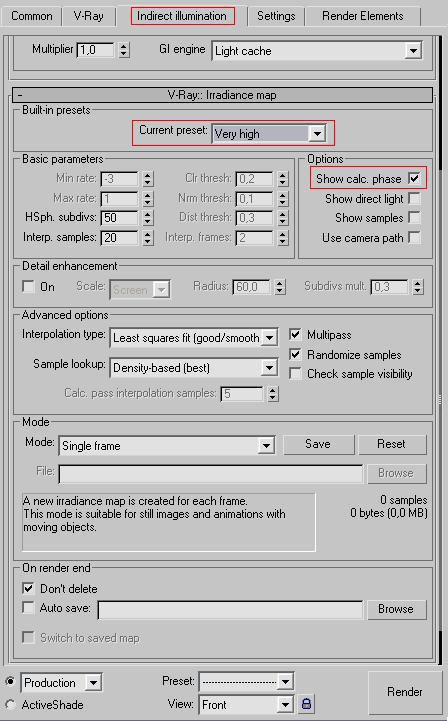
The “Very
high” value has set the right values for most parameters. Now let’s make it
“Custom” to do some enhancements.
Change the
following parameters:
Min rate: set -2 for the test rendering and for the more
quality render use something like -4.
Max rate: set it between -1 and 0 for the test
rendering, for quality rendering set it somewhere between 1 and 2.
You can see
these parameters in work while rendering the scene, by a number of times the
little squares do the same piece of the image.
Set Sample lookup to Overlapping.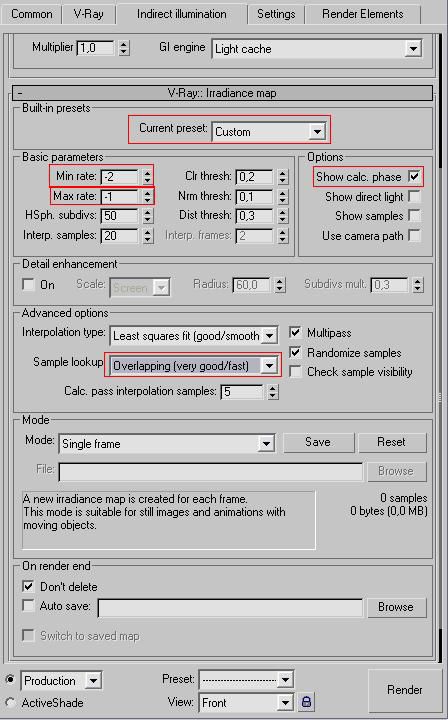
Ok, let’s
move on to Light Cache.
Subdivs –
set in dependence to the render’s resolution, e.g. for 640x480 300 would
be sufficient. But for greater resolution it might be as big as 2000.
Enable Pre filter, use Nearest for the Filtersetting.
And enable Show calc. phase as well.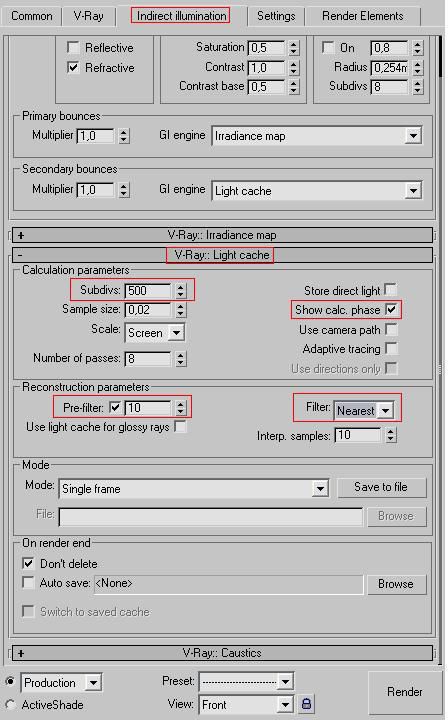
At this
stage we have completed setting up main lightning setting. Let’s change some
system parameters as well.
System settings
Go to Settingstab -> V-Ray::System.
Dynamic memory limit - this setting is set depending on
the volume of operative memory on a computer. Say you’ve got 2 GB of RAM, 1000
MB is then certainly an option for you.
Render
region division – determines the size of the square that
you can see during render. The number of squares depends on how much processing
core you have on the computer. The lesser the square is the faster it will be
renderer, but the whole picture would take more time to render as V-Ray also
will be computing joints between the squares. Optimal value would be something
like 64x64 or 32x32.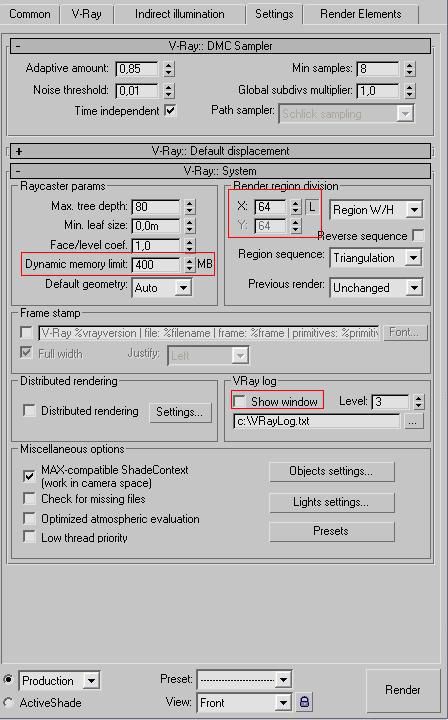
Well this
is it for the start )… We have set up the V-Ray renderer. You could always find
more information in V-Ray manual.
After you
have set up the renderer, it might be a time to start setting up the scene and
placing the lights. This is to be covered in other tutorials.

Obrigado!)
Спасибо!)
Bem-vindo! Eu tenho aqui é tal questão não pode em (Sem cant download presset. Pimp carga não reage quando você pressiona o (No que pode ser um poser?
здравствуйте! У меня вот такой вот вопрос может не по теме( Никак немогу загрузить прессет. Пимпа Load вообще не реагирует при нажатии( В чем может быть проблемка?