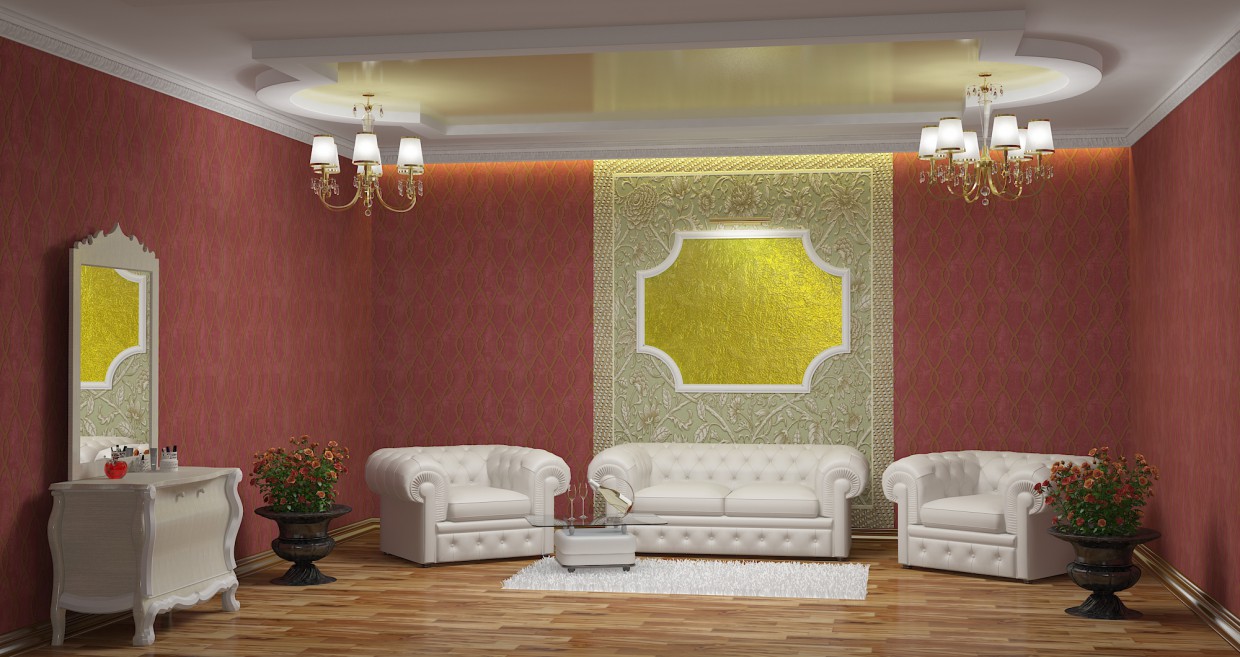
3D visualization lounge

3D-work specification:
| 3D-editor | 3d max |
| Renderer | vray |
| Time expended on work | — |
| Time expended on render | — |
| Polygons | — |
| Publication date |
Send
елена 1973
But this is a class !!!!!
А вот это класс !!!!!
Reply
Translated from ru Show original
Ярослав909
Alexander, you made copies of the work with the courses of the plot-design), I also watched them sometime.) It turned out well.
Александр, вы сделали копии работы с курсов фабула-дизайн) я тоже их смотрел когда-то.) неплохо получилось.
Reply
Translated from ru Show original
Александр32

Thank you, Jaroslav) Yes, you were right to study at this course. All the models tried to pick up to your taste, but the common features still remained) The course is unmatched! I could not but order the continuation of this course, but I have not yet reached it, I try to develop not only in V-ray.
Спасибо, Ярослав) Да, вы правы учился именно по этому курсу. Все модели старался подобрать под свой вкус, но общие черты все равно остались) Курс бесподобный! Не мог не заказать продолжение этого курса, но пока еще до него не дошел, стараюсь развиваться не только в V-ray.
Reply
Translated from ru Show original
Богданова

beautiful! Tell me how to split the wall as well, in 3d maxe
красиво!подскажите пожалуста как поделить стену также ,в 3d maxe
Reply
Translated from ru Show original
Александр32

Thank you. First you need to translate the wall into editable poly, on the polygon sublevel, select the polygon (s) you need and cut it using the slice plane tool that is in the edit geometry on the same sublevel.
Спасибо. Для начала нужно перевести стену в editable poly, на подуровне полигонов выбрать нужный полигон (или полигоны) и разрезать его с помощью инструмента slice plane, который находится во кладке edit geometry на том-же подуровне.
Reply
Translated from ru Show original
Богданова

Thank you so much!!!
Спасибо большое!!!
Reply
Translated from ru Show original
Александр32

You are welcome)
Пожалуйста)
Reply
Translated from ru Show original
Александр32

To cut them you need to click on the slice plane, then use the tools to move, rotate the correct position of the cutting plane and press the slice button, the cut is ready, you can press the slice plane button.
Чтобы им разрезать необходимо кликнуть по slice plane, далее с помощью инструментов перемещение, вращение задать правильное положение секущей плоскости и жмем кнопку slice, разрез готов, можно отжимать кнопку slice plane.
Reply
Translated from ru Show original
Александр32

Now you can apply different textures to different polygons. In order for the cut edges to be visible, you need to enable face mapping (F4), preferably from the very beginning.
Теперь можно наложить разные текстуры на разные полигоны. Для того, чтобы были видны границы разреза нужно включить отображение граней (F4), желательно с самого начала.
Reply
Translated from ru Show original
SkyDive

Super
Reply
Александр32

Thank you so much)
Спасибо большое)
Reply
Translated from ru Show original
beautiful
красиво
Reply
Translated from ru Show original
Александр32

Thank you)
Спасибо)
Reply
Translated from ru Show original
Александр32

my first job)
моя первая работа)
Reply
Translated from ru Show original


 2
2
 3
3
